Projector Placement and Why Vertical Projection Angles Matter
There are various factors most know about when setting up a projection system but the proverbial “devil in the details” often goes overlooked. I’m talking about a projector’s vertical alignment. It is a relatively simple function but it has small elements to it that every installer should be aware of and that goes double for houses of worship.
It may be a small matter but the difference between doing it right and wrong will come with either great rewards or a potentially costly disappointment. This is especially important with Churches because there are so many different ways a projection system can be installed and often, there are more variables at play than an enclosed conference room or home theater. As a person of faith, I want to contribute to your congregation’s success and this is one of those AV veteran moments where a small bit of advice can spare you from buying expensive AV gear you don’t need while getting the best performance out of the equipment you have (or can realistically afford).
This is also a topic that will help enhance you the ability to make wise decisions when buying AV gear whenever an upgrade or new building project is in order. With all that said, saddle up; for the next few minutes we’ve got work to do….but it’s AV stuff… so it really just going to be fun anyway, right?
The pitfalls of doing it wrong
Keep in mind that calculating the wrong projection angle can create a multitude of problems for you.
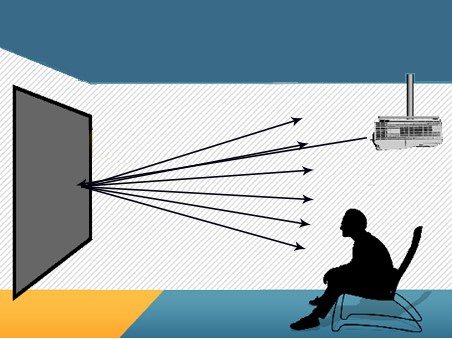
- Keystone effect, is created when the projected image has a trapezoid (trapezium) shape. This is caused when your projected light is hitting the screen surface from too high/low of a vertical angle. Most projectors have a keystone adjuster to correct this but any projector without this feature should only be used in-line with the screen. *Tip, make sure the projector you install can handle the angle of projection you want to achieve.
- Hot-spotting and glare, is when a bright spot or glare appears in your projected image. It typically occurs with higher gain (more reflective) and specialized ambient light rejecting (ALR) projection surfaces. This is often the cause of off-axis projection or trying to use a short-throw (ST) projector with an ALR material. Albeit there are a few exceptions, most ALR materials are not designed for use with “ST”-projectors. Specialty materials always present the greatest risk of occurrence so it is best to check with the manufacturer if ever you have a doubt. *Tip, make sure that your screen material and projector are compatible with one-another; they don’t always get along with one another.

- Off-axis light loss, is when a specialty reflective material such as ALR is used with either too steep of a projection angle or the entire screen and projector installation is not properly aligned with the audience’s eye level. *Tip, matte white materials are best when you have good light control and the projector has good contrast performance. ALR materials are best when there is a lot of ambient light but they come with their own limitations.
This article also serves to aid you in selecting your projection screen so that any alignment issues due to product incompatibility can be avoided. Factors such as , projector type, atmospheric lighting and screen material that all come into play. Since your screen complements your projector, here are some basic rules regarding how to choose the right projector and screen combination.
Selecting the right projector is typically an easy task as long as you remember these guidelines:
- Get a projector that matches your screen’s aspect ratio (explanation of aspect ratios).
- Aspect ratio is the shape of the screen and projected image. Some aspect ratios are for a more squared image while others are of a wider format. For example, television sets of the 1950-90’s were typically in NTSC or (4:3). This means that for every 4-units of horizontal measure, there are 3 equal units of vertical measure. Later HDTV aspect ratios would be (16:9) or 16-units of horizontal measure to every 9-units of vertical measure. Whatever the case, it is important that your video content, projector and screen are all of the same aspect ratio so that the image will be properly formatted.
- Make sure the projector’s throw distance will produce an image that is the same size as your screen.
- There are numerous online calculators in addition to your owner’s manual that will inform you on what size your image will be depending on the “throw distance” or distance from your projector’s lens to the projection surface.
- Most projectors also have a zoom function that will give you some leeway in formatting your image.
- Make sure that the projection angle will not conflict with the design of your projection material
- White projection materials are the best for their wide diffusion uniformity. A projector can make a good image on it from either an in-line, high or low vertical axis. This makes it ideal for high ceiling or low tabletop presentations. Matte white screens are also available in the greatest range of sizes and aspect ratios. Specialty materials such as the new ambient light rejecting (ALR) are meant to be used with more in-line projection displays but have their own advantages as well.
Adjusting Your Vertical Angle
On a projector, there is typically a feature known as vertical lens shift. This is the projector’s ability to shift an image upward or downward from a projector’s static position without need of physically moving the projector itself. Depending on whether you are ceiling-mounting your projector to shoot down on a screen from the front, or “table-top” positioning from in front or behind the screen, will determine the degree of “vertical adjustment” required from your projector. For high ceilings, a projector with up to 3-times the screen height is required. For in-line imaging typically from a table top or low ceiling installation, a projector that can only adjust up to ½ the screen height may likely be the ideal solution.
*Tip, there are times when you will be able to actually tilt the screen itself to accommodate the projection angle you have. This is often practiced with the angular-reflective “ALR” screen materials.
The various types of projection materials and recommended angles of projection
Matte White
- Description: White front projection material
- Strength: Extremely versatile, wide viewing angle, widely available in small to large commercial sizes, can be used with either standard or short throw projectors
- Weakness: Requires light control; will wash out from ambient light. Little if any contrast enhancement
- Suggested projection angle: In-line, High or Low projection angle projection (see projector manual)
ALR, Angular Reflective
- Description: Ambient light rejecting, reflection angle mirrors projection angle
- Strength: Contrast enhancement, superior image brightness even with high levels of indirect lighting
- Weakness: Projection angles are limited, narrower viewing angle due to reduced half-gain cone, does not work with short-throw projectors
- Suggested projection angle: In-line with the possibility of some off-axis projection angle that will not exceed 15? (*Note, tilting the screen may likely be required for optimal visibility.)
ALR, Retro Reflective
- Description: Ambient light rejecting, reflection angle returns directly to angle of projection source
- Strength: Top-tier contrast enhancement and excellent image brightness even with high levels of indirect lighting.
- Weakness: Projection angles are extremely limited and large venue sizes may not be available, slim visibility in vertical off-axis so high-installs are out, narrower viewing angle due to reduced half-gain cone, does not work with short-throw projectors
- Suggested projection angle: In-line projection only, preferably within 10°
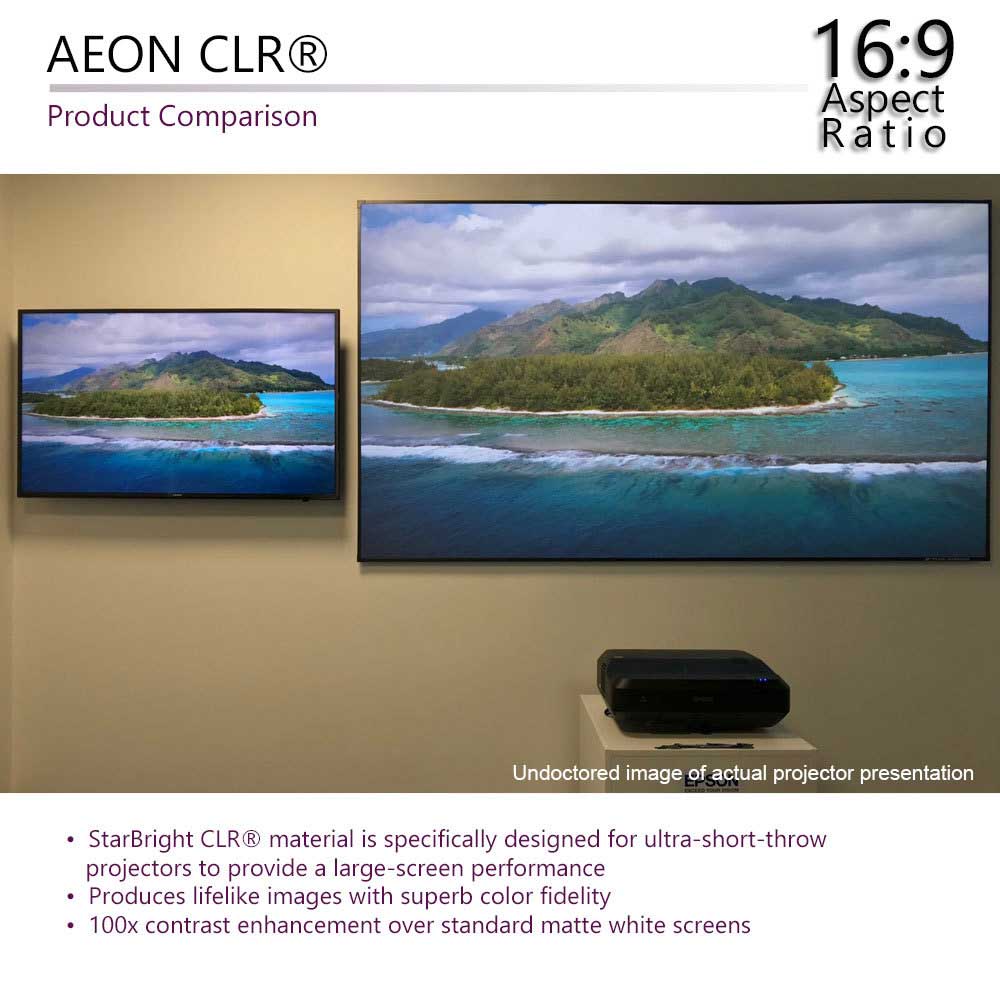
CLR®, Ceiling Light Rejecting (aka. “ST” or “UST” material)
- Description: ALR screen with specialized microstructures that specifically reject up to 95% of overhead lighting while moderately negating ambient light from other sources
- Strength: All the benefits of an ALR and is specially made for short throw projectors
- Weakness: Limited to smaller size options, standard projectors will not work with these
- Suggested projection angle: In-line projection only, never greater than 5°
Rear Projection
- Description: Projector that facilitates images from behind
- Strength: opens up space normally restricted between projector & screen, superior brightness and some ALR properties
- Weakness: Typically does not function for front projection. May not be space conscious to your interior design, hot-spot artifacts are common
- Suggested projection angle: This varies by brand and model. Some are made for off-axis projection while others are exclusively in line – always consult manufacturer
Whatever your requirements are, always make sure that the desired “sweet spot” of optimal projector screen performance will encompass your entire viewing audience. Ambient light rejecting screens are great but they may not be as ideally suited to your large venue presentation as a white screen would be. Either way, always have a good handle on what your projector’s vertical angle is and what angle of projection your screen can handle. If you do it right, you’ll appreciate the results, your congregation will be grateful for a beautiful display and the cost of all this enjoyment should be less than what you may have expected.
DO THE MATH

*See the illustration above for instructions on how to properly calculate projection angles if needed.
When adjusting your projection angle, think in triangular terms. There are 3-points of measurement used in the formula. They are the physical spacing between the projector and center of the screen (A); the height difference between the screen’s center and the projector lens (O); and the calculated throw distance from the lens to the center of the screen (H). *Note, although many retro-reflective screens may be installed at a <10° angle of incidence between the projected angle of incidence and screen, many installers prefer a <5°setting as they believe it to be more certain in achieving the proverbial “sweet spot” with your typical retro-reflective screen material.
In this example, calculate the installation to see whether the material falls within a <5° angle that many installers prefer. Here is How to Calculate in Geometric terms:
- A – is the “adjacent” of the triangle or horizontal measurement
- O–is the “opposite” of the triangle or vertical measurement
- H– is the “hypotenuse” of the triangle or diagonal measurement
Formula for Hypotenuse (H): √(A² + O²) = H
(Use a Scientific Calculator)
- Step 1. Measure the distance of A & O (either metric or imperial) Per the illustrated example above, A= 240” & O= 36” √(240² + 36²) = H
- Step 2. Square both numbers √(57600 + 1296) = H
- Step 3. Add both numbers √(58896) = H
- Step 4. Get the square root and round no lower than the nearest hundredth √ of 58896 ≈ 242.68”
Your measurement of H is 242.7 inches distance between the actual lens and the screen’s center. - Step 5. Calculate the triangle’s Asine by dividing the height (O) by the diagonal (H) 36/242.7 ≈ 0.148
- Step 6. Use the “2nd “ or “Inverse” function on your calculator and press (sin–1) and…
Your estimated angle will be 8.5 degrees. It is suitable for the material but further adjustment may be advised.
What you learned from this calculation is that while your angle of projection is within the tolerance of a typical retro-reflective screen material, further adjustment will be required if you are seeking the <5° angle that many installers prefer.
-DR