Creating a Stunning Home Cinema Screen with a Borderless Projector Screen
Transforming your living room into a captivating home cinema experience is easier than you think. With the latest borderless projector screens, you can create a stunning visual display that will transport you into the heart of the action. These borderless projector screens provide a sleek and seamless edge-to-edge viewing experience, eliminating distractions and maximizing the screen real estate. Say goodbye to clunky frames and borders that take away from the immersive nature of your movie nights. With a wide range of screen sizes and high-quality materials to choose from, you can customize your home cinema to suit your space and preferences. Whether you prefer a smaller screen for intimate movie nights or a larger screen for an authentic cinematic experience, there’s a borderless projector screen that’s perfect for you.
Advantages of using a borderless projector screen
Using a borderless projector screen in your home cinema screen setup offers several advantages that enhance your overall movie-watching experience. Let’s take a look at some of the key benefits:
1. Immersive viewing experience
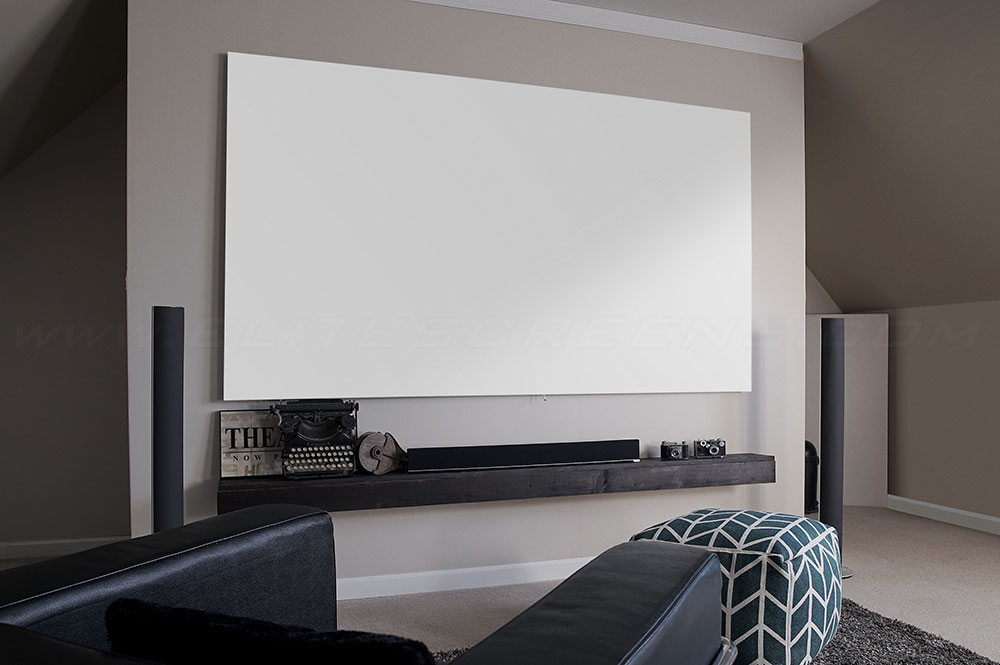
A borderless projector screen provides an immersive viewing experience by extending the image all the way to the edges, eliminating any distracting elements. This allows you to fully immerse yourself in the movie, creating a sense of being transported into the world of the film.
2. Maximized screen real estate
With a borderless projector screen, you can maximize the screen real estate, making the most out of your projector’s capabilities. By eliminating frames and borders, you can enjoy a larger and more expansive view, enhancing the overall visual impact of your movie-watching experience.
3. Sleek and modern design
The sleek and borderless design of these projector screens adds a touch of elegance and sophistication to your home cinema setup. The absence of clunky frames and borders creates a seamless integration with the surrounding decor, elevating the overall aesthetic appeal of your living room.
4. Customizable screen sizes
Borderless projector screens come in a variety of screen sizes, allowing you to choose the perfect size for your home cinema setup. Whether you prefer a smaller screen for intimate movie nights or a larger screen, a borderless projector screen will fit your space and preferences.
5. Easy installation and maintenance
Borderless projector screens are designed for easy installation and maintenance. They come with user-friendly mounting systems and are made from durable materials that are easy to clean and maintain. This ensures that you can enjoy your home cinema setup without any hassle or inconvenience.
Overall, using a borderless projector screen in your home cinema setup enhances the visual experience, adds a touch of elegance to your living room, and provides flexibility in terms of screen sizes, making it a must-have component for any movie enthusiast.
Factors to consider when choosing a borderless projector screen
Choosing the right borderless projector screen for your home cinema setup requires careful consideration of various factors. To ensure that you make an informed decision, here are some key factors to keep in mind:
- Screen size
The screen size is one of the most important factors to consider when choosing a borderless projector screen. It should be determined by the size of your room, the viewing distance, and the type of content you’ll be watching. A screen that is too small might not provide an immersive viewing experience, while a screen that is too large might overwhelm your space. Measure your room and consider the optimal viewing distance to determine the right screen size for your home cinema setup.
- Screen material
The screen material is crucial in determining the image quality and viewing experience. Common screen materials include matte white, gray, and acoustically transparent options. Matte white screens are versatile and offer excellent color reproduction, making them suitable for a wide range of content. Gray screens are designed to enhance contrast and black levels, making them ideal for rooms with ambient light. Acoustically transparent screens allow you to place speakers behind the screen for a more immersive audio experience. Consider your room conditions and personal preferences when choosing the screen material.
- Aspect ratio
The aspect ratio of the screen refers to the ratio of width to height. The most common aspect ratios for home cinema screens are 16:9 and 2.35:1. The 16:9 aspect ratio is ideal for watching modern movies and TV shows. In contrast, the 2.35:1 aspect ratio is suitable for widescreen movies. If you watch a mix of content, you can choose a motorized screen that allows you to switch between different aspect ratios.
- Gain
The gain of a projector screen refers to its ability to reflect light back to the viewer. Screens with higher gain reflect more light, resulting in brighter images, while screens with lower gain offer wider viewing angles and better uniformity. Consider the ambient light conditions in your room and the brightness capabilities of your projector when choosing the screen gain.
- Installation
Consider the installation requirements of the borderless projector screen before making a purchase. Fixed frame screens require wall mounting, while motorized screens require electrical wiring. Portable screens, on the other hand, offer the flexibility of easy setup and transportation. Choose a screen that suits your installation preferences and capabilities.
Considering these factors, you can select a borderless projector screen that perfectly suits your home cinema setup and preferences, ensuring an optimal viewing experience.
Setting up a borderless projector screen in your home cinema
Setting up a borderless projector screen in your home cinema is a straightforward process that requires careful planning and attention to detail. Follow these steps to ensure a seamless and hassle-free installation:
1. Choose the right location
Select a location in your living room where the screen will be the focal point. Consider room size, viewing distance, and ambient light conditions. Ensure that there is enough space for comfortable seating and that the screen is at eye level when seated.
2. Prepare the wall
If you’re installing a fixed frame borderless screen, ensure it is clean and smooth. Remove any wall decorations or artwork that might interfere with the screen placement. Use a level and measuring tape to mark the position of the screen and ensure it is centered.
3. Mount the screen
Follow the manufacturer’s instructions to mount the borderless screen securely to the wall. Use a level to ensure that the screen is perfectly straight and aligned. Take your time to ensure a precise installation, as any misalignment will be noticeable once the projector is in use.
4. Connect the projector
Connect your projector to a power source and the video source (such as a Blu-ray player or media streaming device). Adjust the projector settings to match the screen size and aspect ratio. Use the projector’s zoom and focus controls to achieve a sharp and properly scaled image.
5. Calibrate the image
Use the projector’s built-in calibration tools or a calibration disc to adjust the image settings. This includes adjusting the brightness, contrast, color temperature, and sharpness to achieve optimal image quality. Test various content types, such as movies and TV shows, to ensure that the image settings are suitable for different viewing scenarios.
6. Fine-tune the audio
Consider the audio setup in your home cinema and ensure the speakers are positioned correctly for optimal sound quality. Experiment with speaker placement and settings to achieve the best possible audio experience. Consider using an audio calibration tool or consulting with an audio professional for optimal results.
7. Test and enjoy
Once everything is set up and calibrated, test your home cinema setup by watching your favorite movies or TV shows. Take the time to fine-tune the settings and make any necessary adjustments to ensure an immersive and enjoyable viewing experience.
By following these steps, you can set up a borderless projector screen in your home cinema and create a captivating movie-watching environment.
Achieving optimal picture quality with a borderless projector screen
To achieve optimal picture quality with a borderless projector screen, it’s essential to consider various factors that impact the viewing experience. Here are some tips to help you maximize the image quality:
- Brightness and contrast
Adjust the brightness and contrast settings of your projector to ensure that the image is well-balanced and vibrant. Avoid setting the brightness too high, as it can result in washed-out colors and reduce the overall image quality. Similarly, adjust the contrast to achieve a good balance between bright and dark areas of the image.
- Color accuracy
Calibrate your projector’s color settings to ensure accurate and natural color reproduction. Use a calibration disc or software to adjust the color temperature, saturation, and hue. This will help to eliminate any color cast and ensure that the colors are rendered accurately on the screen.
- Resolution and aspect ratio
Ensure your projector is set to the native resolution and aspect ratio of the content you’re watching. This will ensure that the image is displayed at its optimal quality and aspect ratio. Adjust the zoom and focus controls of the projector to achieve a sharp and properly scaled image.
- Screen material
The screen material plays a crucial role in the image quality. Consider the ambient light conditions in your room and choose a screen material that offers optimal brightness and contrast. Matte white screens are versatile and offer excellent color reproduction, while gray screens are designed to enhance contrast in rooms with ambient light.
- Screen placement
Ensure the screen is positioned correctly and aligned for optimal viewing. The screen should be at eye level when seated, and there should be no obstructions or reflections that can interfere with the image quality. Use a level and measuring tape to ensure the screen is centered and aligned.
- Room lighting
Pay attention to the lighting conditions in your room, as they can significantly impact the image quality. Ideally, your home cinema should have controlled lighting, with minimal ambient light. Use blackout curtains or blinds to block out any external light sources that can affect the image quality.
By considering these factors and making the necessary adjustments, you can achieve optimal picture quality with your borderless projector screen, ensuring a stunning visual display for your home cinema setup.
Enhancing the audio experience in your home cinema with a borderless projector screen
While a borderless projector screen enhances the visual experience in your home cinema, it’s equally important to pay attention to the audio setup to create a truly immersive movie-watching experience. Here are some tips to enhance the audio experience in your home cinema:
Speaker placement
Proper speaker placement is essential for optimal sound quality. Consider a surround sound setup with speakers positioned strategically around the room. The front speakers should be placed on either side of the screen at ear-level height. The rear speakers can be placed behind the seating area or on the side walls to create a surround sound effect. A center speaker can also be placed above or below the screen to ensure clear dialogue.
Acoustic treatment
The acoustics of your home cinema can greatly impact the audio experience. Consider adding acoustic panels or sound-absorbing materials to the walls to reduce echo and improve sound clarity. Bass traps can also be placed in corners to control low-frequency sound reflections. By optimizing the acoustics, you can achieve a more balanced and immersive sound experience.
Calibration
Properly calibrating your audio system is essential to ensure accurate sound reproduction. Use a sound level meter to set the volume levels of each speaker to achieve a balanced soundstage. Adjust the speaker distances and delays to synchronize the sound from each speaker. Use a room correction system or equalizer to fine-tune the audio response based on the room’s acoustics.
Subwoofer placement
The placement of the subwoofer is crucial to achieving deep and impactful bass. Experiment with different locations in the room to find the optimal placement. Ideally, the subwoofer should be placed near a wall or corner to take advantage of the room’s natural bass reinforcement. Avoid placing it in a location that creates a boomy or uneven bass response.
Conclusion
While a borderless projector screen can enhance the visual experience in your home cinema, it’s important to complement it with a well-designed audio setup. Proper speaker placement, acoustic treatment, calibration, and subwoofer placement are key factors in creating a truly immersive movie-watching experience. By paying attention to these aspects, you can achieve a balanced and realistic sound that complements the stunning visuals provided by the borderless projector screen. So, elevate your home cinema to new heights by investing in a borderless projector screen and an enhanced audio setup. Sit back, relax, and enjoy the ultimate movie experience in the comfort of your own home.