Electric Screen Accessory
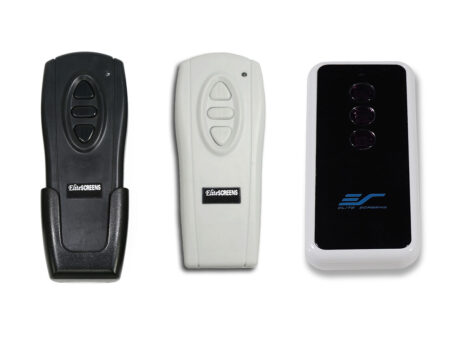
IR Remote


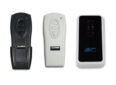
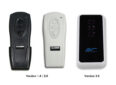

Infrared remote control for all Electric Series models.
- IR remote for Electric screens
- Works up to 30 feet
- Choice of Black or White – Dependable on Version
- Includes slide pocket for wall installation
- Requires two AAA batteries (included)
- ZSP-IR-W : White
- ZSP-IR-B : Black
- For use with : Spectrum, Spectrum Tab-Tension, VMAX2, Saker, Saker Tab-Tension, CineTension2, Home 2, Evanesce, Evanesce B, Evanesce Tab-Tension, Evanesce Tab-Tension B, Evanesce Plus, Saker Plus, Kestrel Home 2
N/A


Elite provides binary codes for the IR remote, see below.
| Series | Up | Stop | Down |
| CineTension 2 Series | 1111 0000 0001 | 1111 0000 0010 | 1111 0000 0100 |
| Evanesce / Evanesce Tab-Tension B | 1111 0000 0001 | 1111 0000 0010 | 1111 0000 0100 |
| Home2 Series | 1111 0000 0001 | 1111 0000 0010 | 1111 0000 0100 |
| Spectrum Series | 1111 0000 0001 | 1111 0000 0010 | 1111 0000 0100 |
| Spectrum Tab-Tension Series | 1111 0000 0001 | 1111 0000 0010 | 1111 0000 0100 |
| Spectrum Tab-Tension 2 Series | 1111 0000 0001 | 1111 0000 0010 | 1111 0000 0100 |
| Starling 2 / Starling Tab-Tension 2 Series | 1101 0000 1000 | 1101 0001 0000 | 1101 0010 0000 |
| VMAX2 Series | 1111 0000 0001 | 1111 0000 0010 | 1111 0000 0100 |
| VMAX Tab-Tension Dual Series | 1111 0000 0001 | 1111 0000 0010 | 1111 0000 0100 |
Elite’s V2.0 infrared remotes
| Series | Up | Stop | Down |
| V2.0 infrared remotes | 1111 0000 0010 0101 1101 1101 1010 1001 | 1111 0000 0001 0101 1100 1100 0111 1000 | 1111 0000 0100 0101 1110 1110 1100 1001 |
| V2.0 infrared remotes | 0011 0000 | 0101 0000 | 0110 0000 |
| ZZ Type | 0011 0000 | 0101 0000 | 0110 0000 |
There’s a couple of suggestions.
1. If controlling your screen’s drop and rise with a light switch, we offer our (ZIW) integrated wall switch that will work just fine with your electric projection screen.
2. To operate the projection screen using the 12-Volt trigger, We recommend connecting the trigger’s RJ45 connection to your projector since it was designed solely for that purpose. Running the 12-Volt trigger through an AC/DC converter will likely not work and may even prove harmful to your product or the projector screen’s main board, so we strongly advise against experimentation with mismatched accessories doing what they were not designed to do.
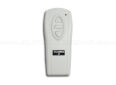
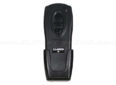
The IR remote is an InfraRed remote. Infrared is based on the “light” part of the electromagnetic spectrum. The RF remote is a Radio Frequency remote. Radio frequency is based on the “radio” section of the electromagnetic spectrum. While the IR remote control requires direct aim to the receiver in order for the signal to be received, the RF remote control can be pointed in any direction to function as long as the signal is within range
Regarding the amperage of Elite’s 5-12V Triggers, their transistor pulls (3.3V)) to MCU GPIO. This means that the RF remote input is 12V and the driving Amp is :2mA. Through the RJ45 port, the input is 12V,and the driving amp is: 1mA.
Yes, we do have a color coded pin assignment diagram for our RJ45 port. Click here for PDF.
Our IR remote controls have been evaluated and entered in to the databases of some Universal remote control manufacturers. Please contact the manufacturer of your remote to inquire about your remotes ability to function with ours. Crestron and AMX are partners of ours and they do have our IR codes in their products.
Please see the codes listed below.
UP (Protocol: F12 Device Code: 07.01 Function: 40) 0000 006D 0018 0000 0030 0011 0030 0011 0030 0011 0030 0011 0010 0031 0010 0031 0010 0031 0010 0031 0010 0031 0010 0031 0030 0011 0010 053E 0030 0011 0030 0011 0030 0011 0030 0011 0010 0031 0010 0031 0010 0031 0010 0031 0010 0031 0010 0031 0030 0011 0010 053E
STOP (Protocol: F12 Device Code: 07.01 Function: 80) 0000 006D 0018 0000 0030 0011 0030 0011 0030 0011 0030 0011 0010 0031 0010 0031 0010 0031 0010 0031 0010 0031 0010 0031 0010 0031 0030 051E 0030 0011 0030 0011 0030 0011 0030 0011 0010 0031 0010 0031 0010 0031 0010 0031 0010 0031 0010 0031 0010 0031 0030 051E
DOWN (Protocol: F12 Device Code: 07.01 Function: 20) 0000 006D 0018 0000 0030 0011 0030 0011 0030 0011 0030 0011 0010 0031 0010 0031 0010 0031 0010 0031 0010 0031 0030 0011 0010 0031 0010 053E 0030 0011 0030 0011 0030 0011 0030 0011 0010 0031 0010 0031 0010 0031 0010 0031 0010 0031 0030 0011 0010 0031 0010 053E
The output voltage is 3 volts and wattage is 3 milliwatts
If your RF remote control does not work with your screen, try the following to get in synced. See below for instructions. Make sure new batteries or working batteries are in your RF remote control before proceeding with the steps. For V 2.0/ 3.0 electric screens. The version number can be found on the remote control, the sticker on the screen’s end cap, or the packing box.
1. Unplug your screen from the power outlet
2. Hold the UP button on your RF remote
3. While holding the UP button, plug the screen back to the power outlet
4. Wait 5 seconds and then release the UP button
5. Now you can use your RF remote
For V 1.4-1 and below (ex 1.3, 1.4, 1.4-1)
1. Press & hold the Up button on your RF remote control so the LED light turns on
2. While holding the UP button on your RF remote, simultaneously push the small button located on the circuit board. In some cases, you can press this button through a hole on the end cap. (Please note you may need a small sharp object to achieve this.)
3. Continue to hold the UP button for an additional 3 seconds.
4. After 3 seconds, your RF remote should now by synced to control your screen.
For RF remotes no matter the color black or white, V2.0 and V3.0 electric screens E, H, M, Z. basically screens from 2009 to 2023 the sync instructions will be the same. NO RC1 SCREENS.
If you check the user guide, the same instructions apply for any RF remote with below shape.
1. Unplug your screen from the power outlet
2. Hold the UP button on your RF remote
3. While holding the UP button, plug the screen back to the power outlet
4. Wait 5 seconds and then release the UP button
5. Now you can use your RF remote
For Instructional video please click here
A: The output voltage is 3 volts and the wattage is 3 milliwatts
The frequency of the RF remote is 433MHz
Yes there is. You will need to splice your USB cable with an RJ45 cable. A USB has 4 wires, but you will only need the red and black. Splice them to the RJ45 orange and green wires and connect the USB. See diagram below for reference. (Not Compatible with SWIFT-RC1 Control System which uses RJ50) NOTE: If you are using your own RJ45, please use Pin 7 and 8 (Brown Pair Wire).
Click here for Color Codes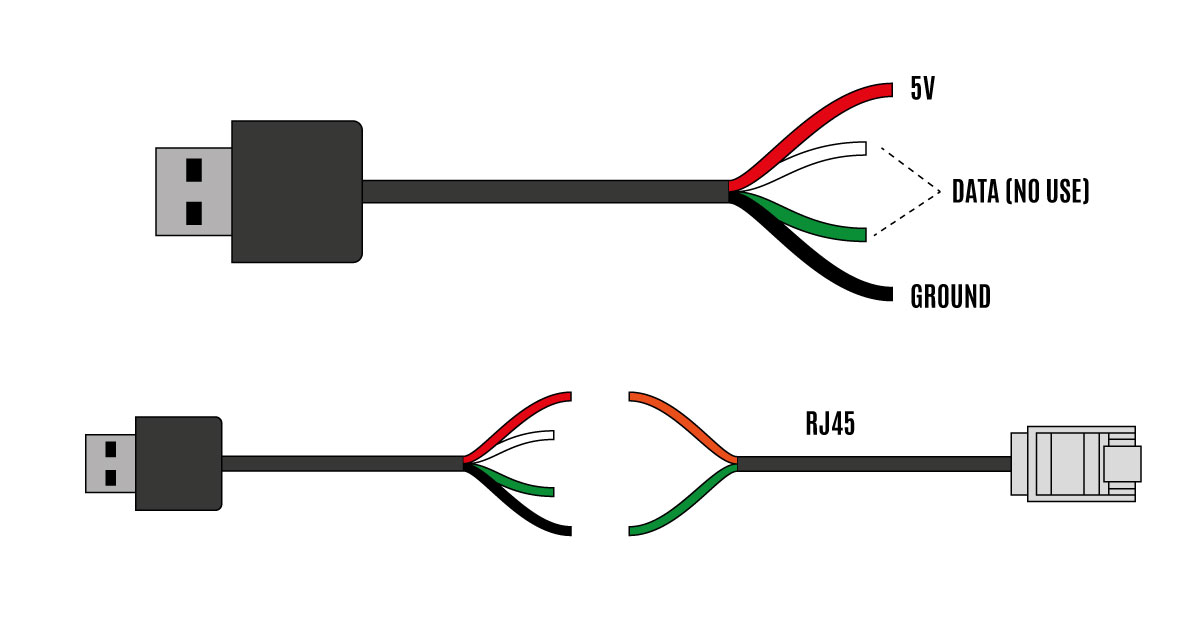
Yes, version 2.0 screens have a reset button located on the circuit board which helps eliminate RF interference. Please Click Here for instructions on how to locate the circuit board on your screen.
See diagram below for wiring information.
Download and print this drawing (PDF)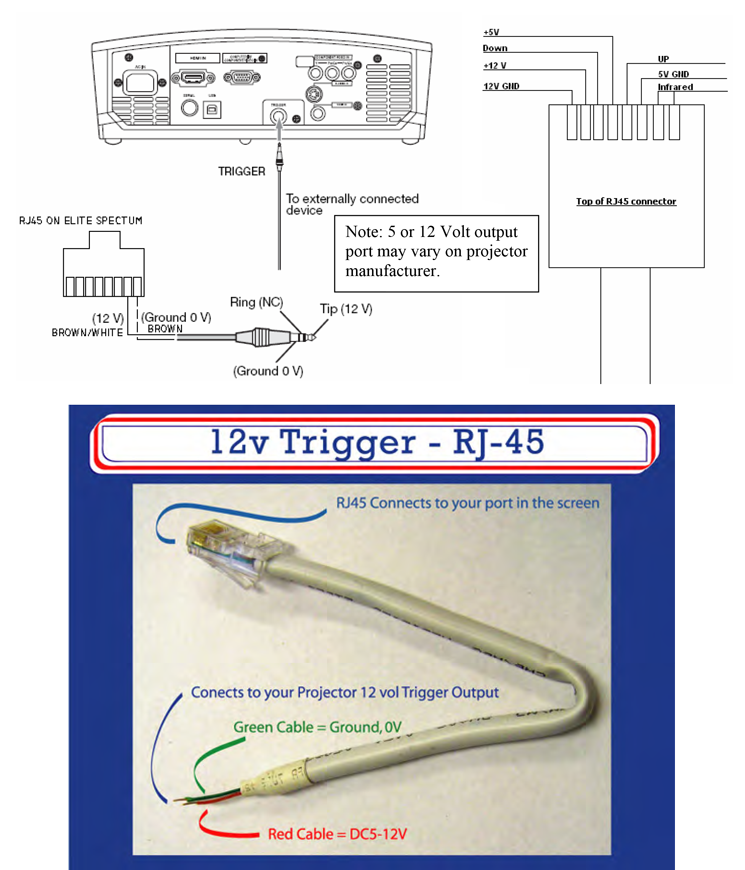
2-year limited warranty, and 3-year warranty for ENR-G – Education, Non-profit, Religious and Government/Military organizations
Lifetime Tech Support by Elite Screens Professional Service Team through Email, Phone or Online Form.
Related Products
-
-
-
CineTension 2 Series
$0.00Select options This product has multiple variants. The options may be chosen on the product pageDiscontinued -
-

-

Home 2 Series
$0.00 Select options This product has multiple variants. The options may be chosen on the product pageDiscontinued